Tutorial: combining two layers in the web UI
Originally contributed by Amanda Hickman to the project wiki.
This walkthrough shows how to combine and prune two boundary layers to produce a single GeoJSON file you can use as a custom basemap (for example, in Datawrapper).
The example builds a basemap of the San Francisco Bay Area, with both county boundaries and the cities ("places") inside them.
The walkthrough uses the web app at mapshaper.org, driving the workflow from the Console. The same commands work on the CLI — chain them together with leading - prefixes (so clip bayarea_county becomes -clip bayarea_county) and connect them with backslash line continuations.
The starting data
We'll use two source files:
- A county boundary file from the California Open Data Portal — or, in this case, a version clipped to the shoreline from UC Berkeley's Geo Data Commons. The shoreline-clipped version reads more naturally on a map than the legal-boundary version, which extends into the bay.
- A statewide places boundary file for city boundaries.
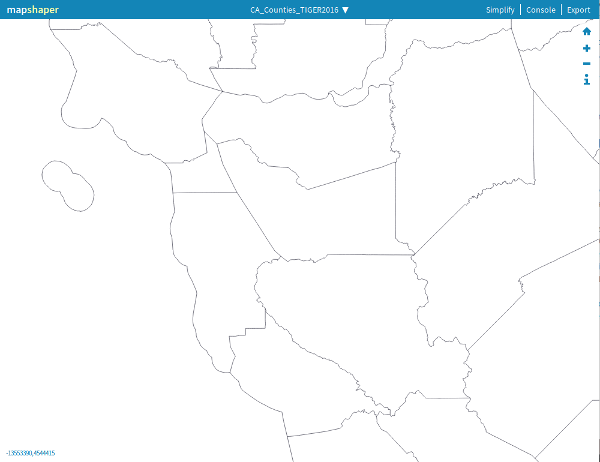
The legal county boundaries from the Census TIGER files extend straight across the water — San Francisco even reaches out to include the Farallon Islands:
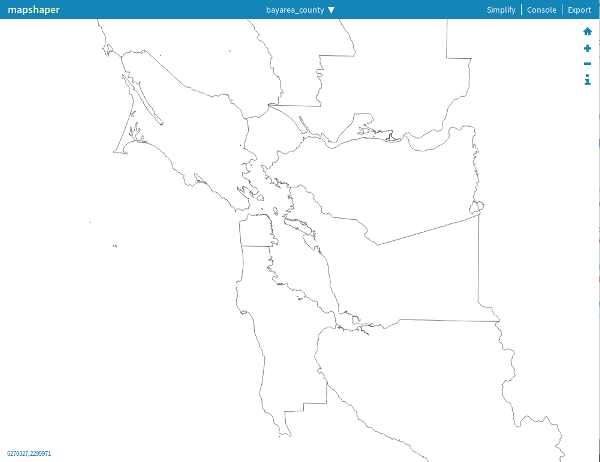
The Berkeley library's version is clipped to the shoreline, so the bay shows as empty space between the counties:
Download both as .zip files.
Open them in Mapshaper
Drag the two .zip files onto mapshaper.org, or run the web app locally with mapshaper-gui. You'll end up with two layers loaded into the session.
Set the projection
Datawrapper expects WGS84 coordinates. Open the Console (top-right of the header) and run, with each layer selected:
proj wgs84
You'll need to run this once per layer — switch which layer is selected in the layer panel between runs.
→ See the -proj reference.
Clip the places layer to the Bay Area
The places layer covers the whole state. We only want places inside the Bay Area counties. With the places layer selected:
clip bayarea_county
→ See the -clip reference.
Alternatively, if the places layer has a COUNTY attribute, a filter expression works too:
filter '["Marin", "Contra Costa", "Alameda",
         "San Francisco", "Santa Clara", "San Mateo"].includes(COUNTY)'
→ See the -filter reference.
Merge the layers
The two layers can now be combined into a single layer with -merge-layers:
merge-layers target=bayarea_county,california_place_clipped force
The force flag is needed because the two layers have different attribute schemas; without it, Mapshaper refuses to merge layers whose fields don't match.
Export
Open the Export panel (top-right of the header), pick GeoJSON as the format, and save the merged layer. You can now upload that file to Datawrapper (or any other tool that accepts GeoJSON) as a custom basemap.
What you've learned
- How to load multiple data files into one Mapshaper session.
- How to apply a projection inside the web UI's console.
- How to clip one layer by another.
- How to merge two layers into a single layer for export.
For more on layers and how Mapshaper organizes multi-layer datasets, see The command-line tool.